
Unlike earlier, now you can open SBI Savings Account through online using your computer or Mobile phone. This article will explain you how to open SBI savings account through their SBI Yono website.
Table of Contents
About SBI
State Bank of India is a Fortune 500 company. It is an Indian Multinational, Public Sector Banking and Financial services company headquartered in Mumbai. It is the largest Indian Bank with 1/4th market share and functioning with 22,000 branches, 58,500 ATMs, 66,000 BC outlets. Also, it has spread its presence globally and operates across time zones through 233 offices in 32 foreign countries.
A savings account is a basic type of bank accounts that allows you to deposit money, keep it safe, withdraw funds, and above all earn interest. As the name suggests, the main purpose of a savings account is saving funds for your future use. To know more about what is savings account? Click Here
How to open SBI Yono Saving account online?
State Bank of India offers wide verity of Savings Account that can be opened through Online and branch. The following are the steps to open SBI savings account online
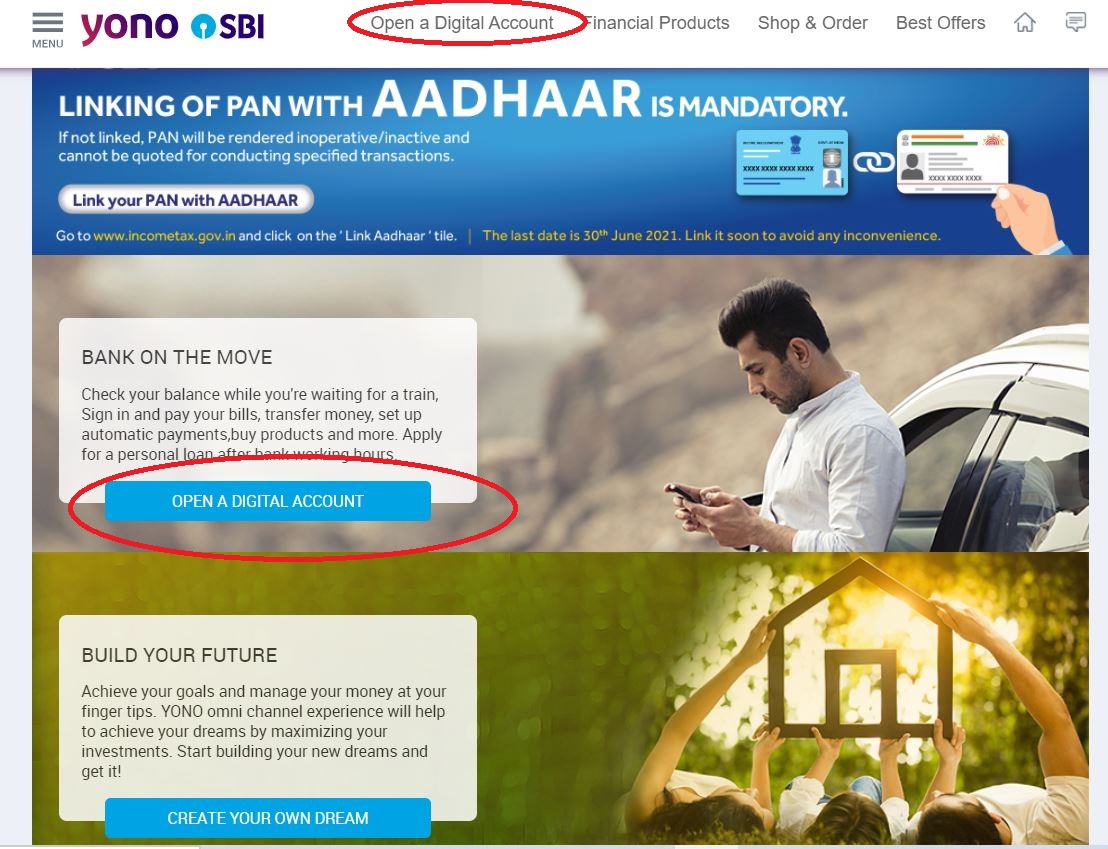
- Firstly, go to SBI Yono website https://www.sbiyono.sbi/index.html in your computer or download SBI Yono app in your smart phone.
- Then click on the ‘Open a Digital Account‘ in the home screen as shown in the image.
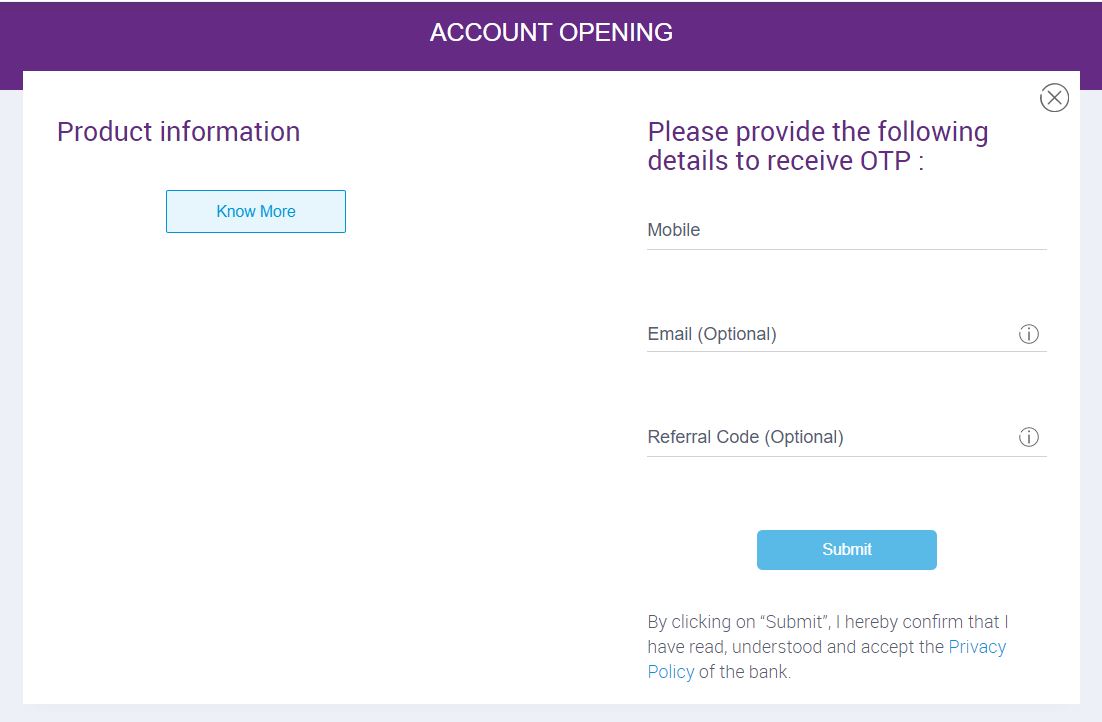
- Then, in the next screen, click on the ‘Apply Now‘ option

- In the next screen, Enter your mobile number and email address and click on ‘Submit‘ button to receive OTP. Now, you will receive two different OTP to your mobile number and email address respectively.
- Enter the Mobile OTP and Email OTP in the respective field and click on the ‘Submit‘ button. Then you will be moved to the next screen.

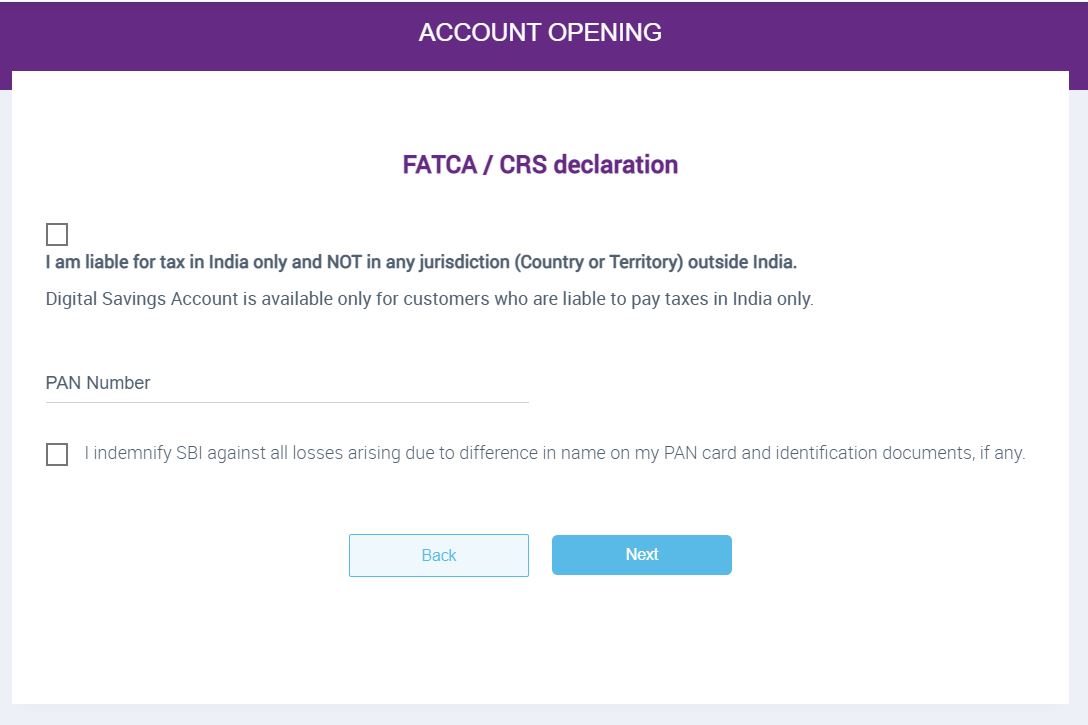
- In the next screen, you will be asked for FATCA/CRS declaration and your PAN number. Check the FATCA check box and enter your PAN number and check the Indemnify check box and then click on the ‘Next‘ button.
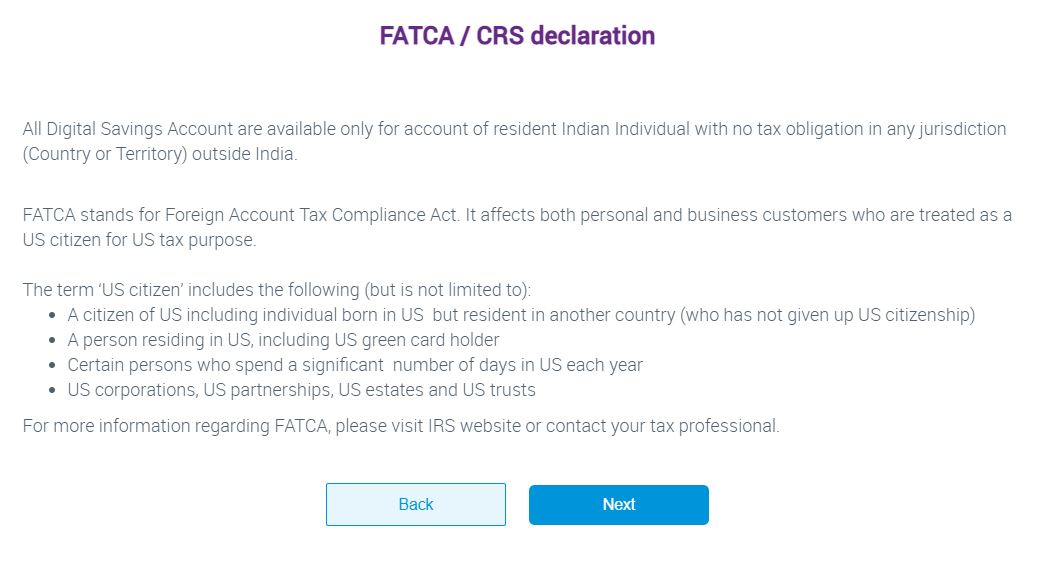
- It will display the FATCA/CRS declaration content in the next screen. Read the content and click on the ‘Next‘ button.
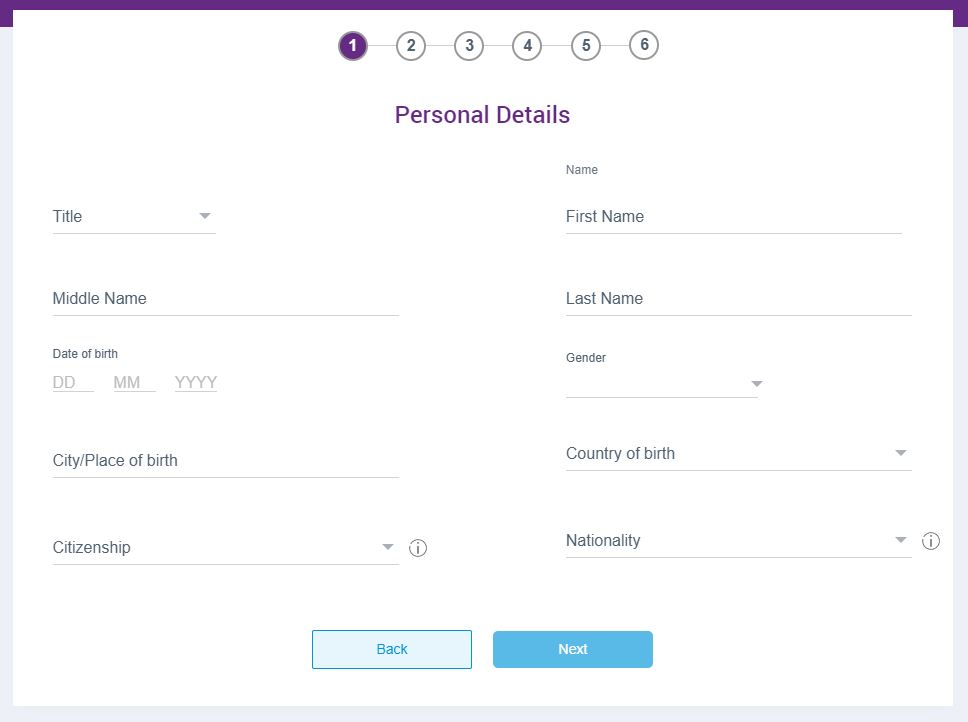
Proof of Identity and Personal Information
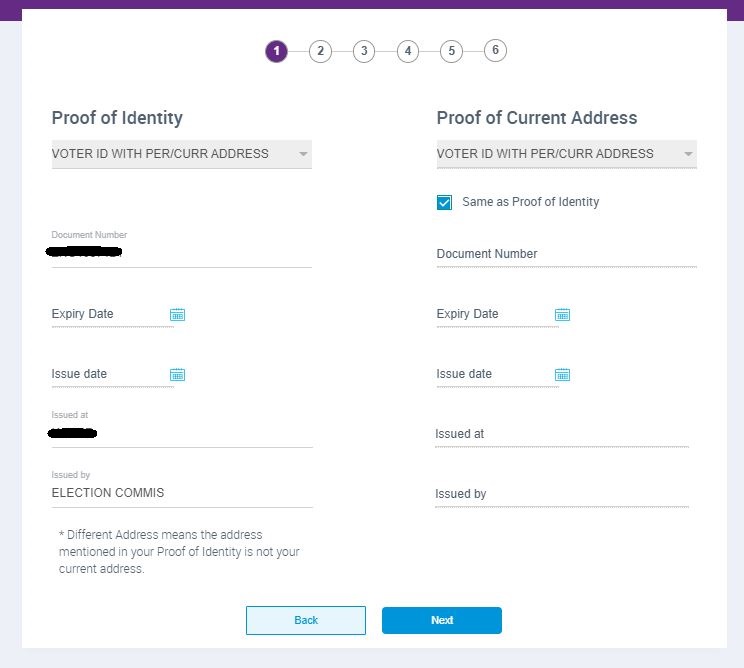
- Then, you have to select your Proof of Identity from the drop down list. The list will contain the following proof of identity
- Voter ID with permanent/current address
- Driving Licence with permanent/current address
- Passport with permanent/current address
- NREGA JOB CARD with permanent/current address
- Enter the respective document number, issued at, issued by details as shown in the image and click on the ‘Next‘ button. Then It will ask for your personal details in the next screen.
- Fill all your personal details such as Your name, DOB, Gender, Place of birth, Country of birth, Citizenship, Nationality and then click on the “Next” button.
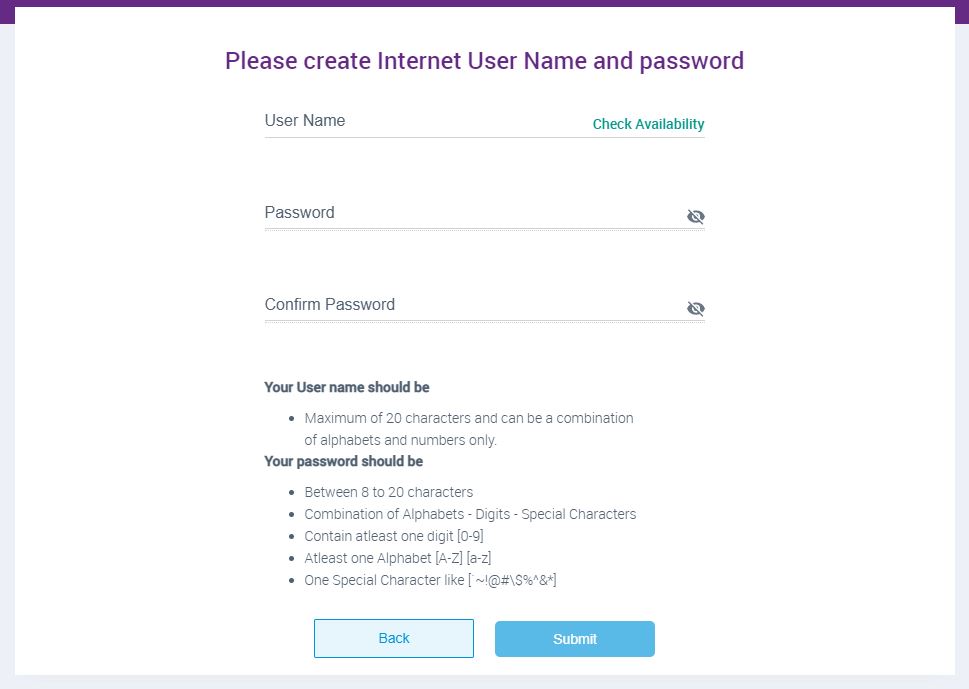
Internet User Id and Password creation
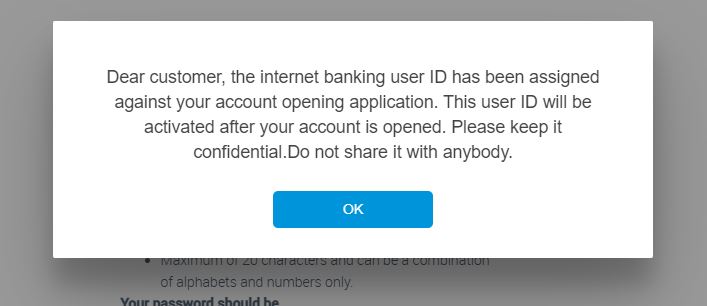
- Now, in the next steps you have to create Internet User Name and Password for your account. However, Internet user id will be activated only after your account is opened. So please keep it confidentially.
- In the next step, you have to enter your current address details such as Street Name, Area Name, Pin code, State as per your proof of address and click on the ‘Next‘

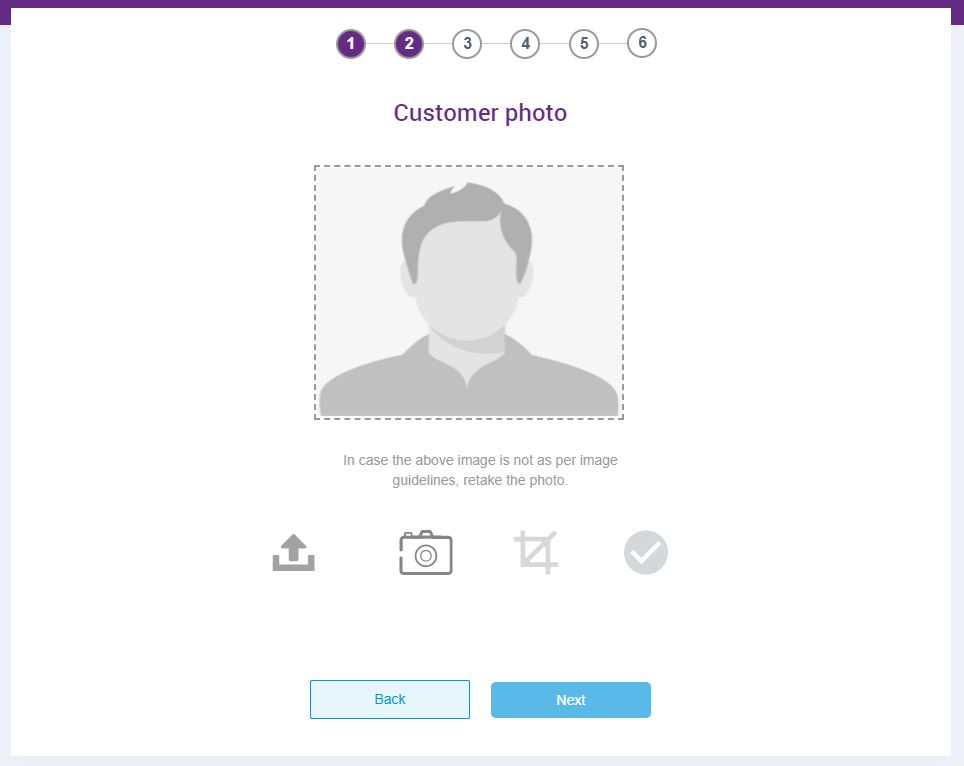
- In the next step, you have to upload your photo and then click on ‘Next‘ button.
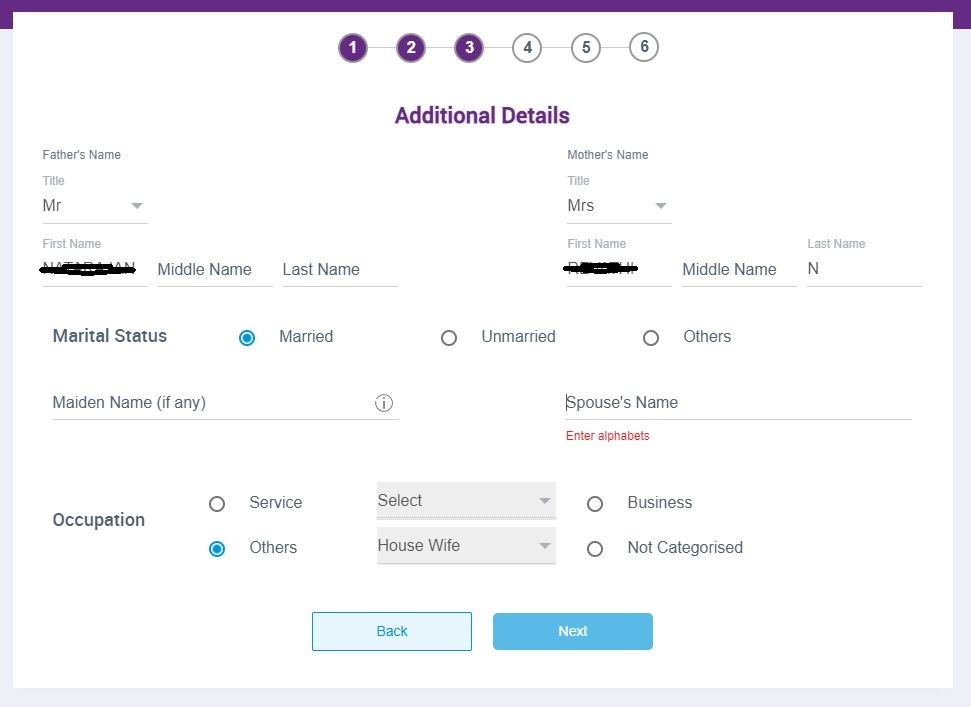
- Now it will ask for your additional details such as your Father Name, Mother Name, Marital Status, Occupation.
- Fill all those details in the relevant field and click on ‘Next‘ button
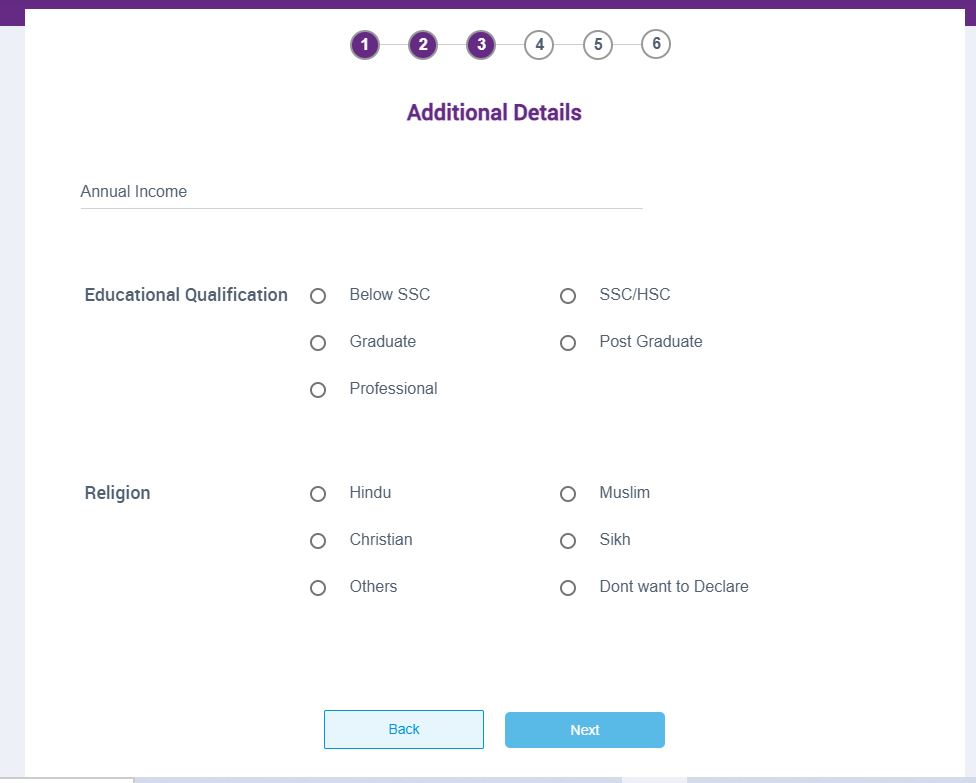
- Now fill some more additional details like your Annual income, Educational qualification, Religion and then click on ‘Next‘ button.
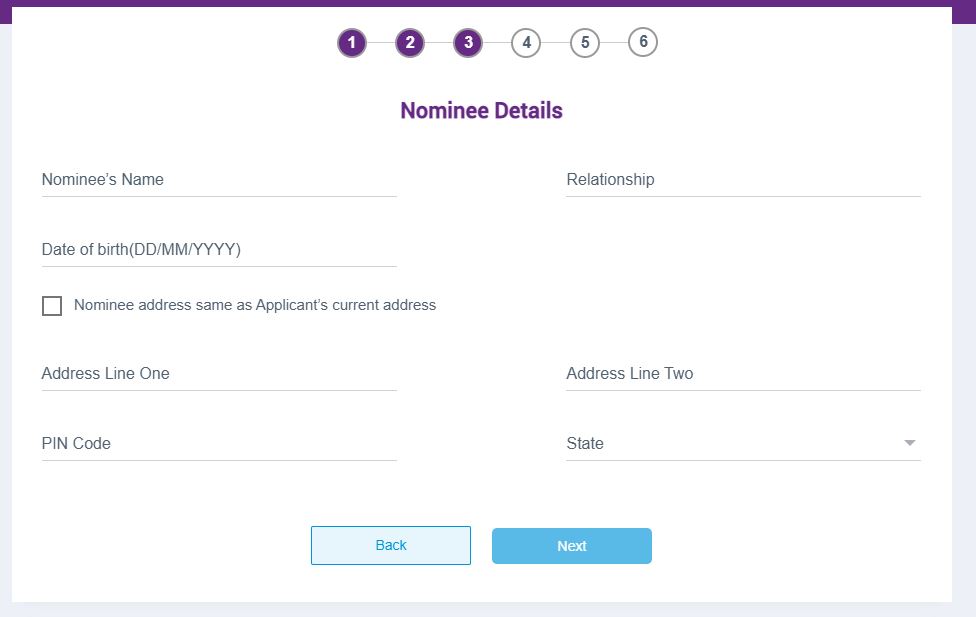
- Then, fill your Nominee Name, Relationship, DOB and Address and click on ‘Next‘ button.
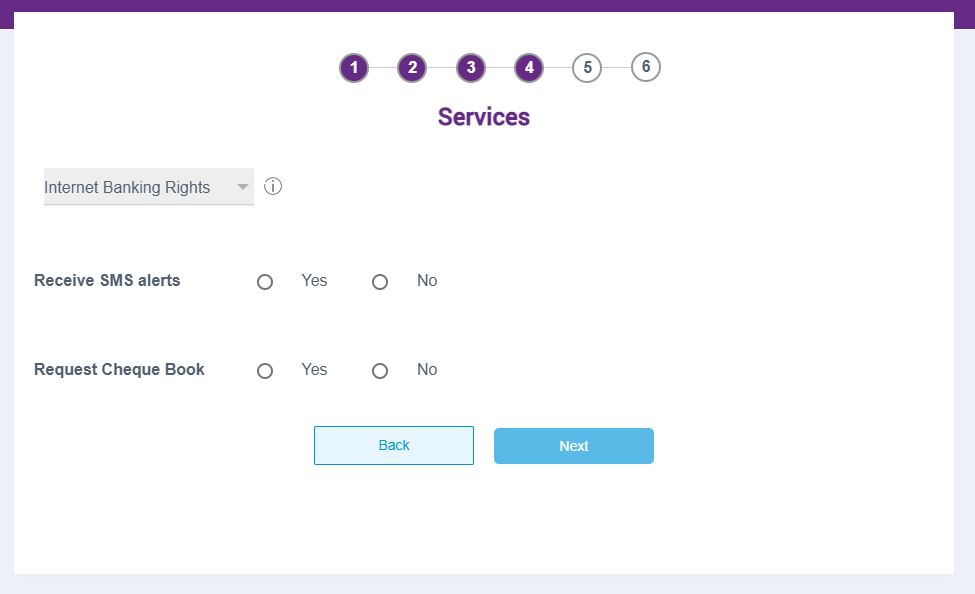
- Now select your internet banking rights from the drop down list. Also check for SMS alerts, Cheque Book and click on ‘Next‘ button.
Information on other Product & Offerings
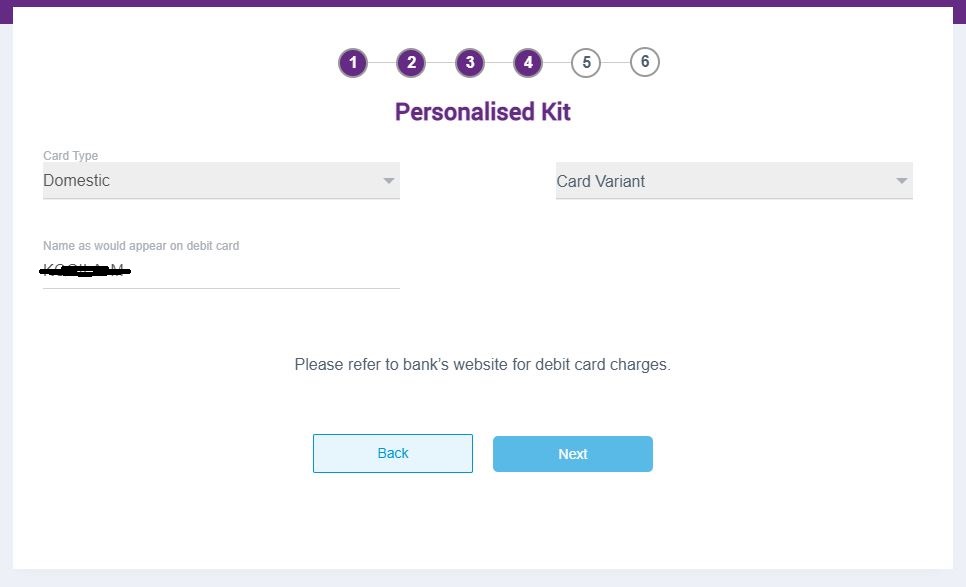
- Now select for your personalised debit card from the list and click on ‘Next‘ button.
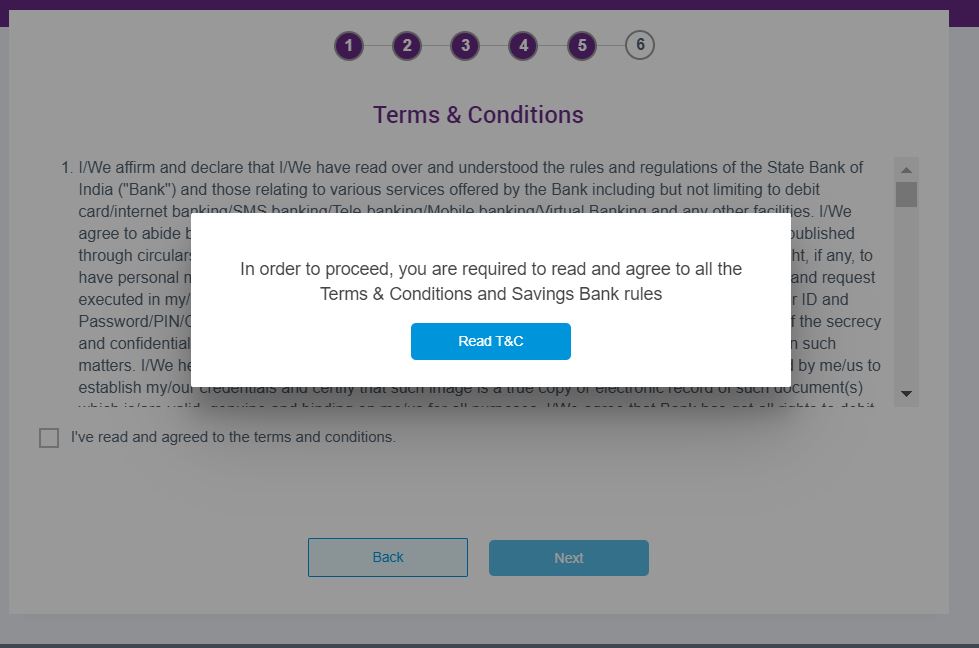
- In the next step, it will display Terms & Conditions of the online SBI Savings account opening. Read it carefully, click on the check box and press on ‘Next‘ button.
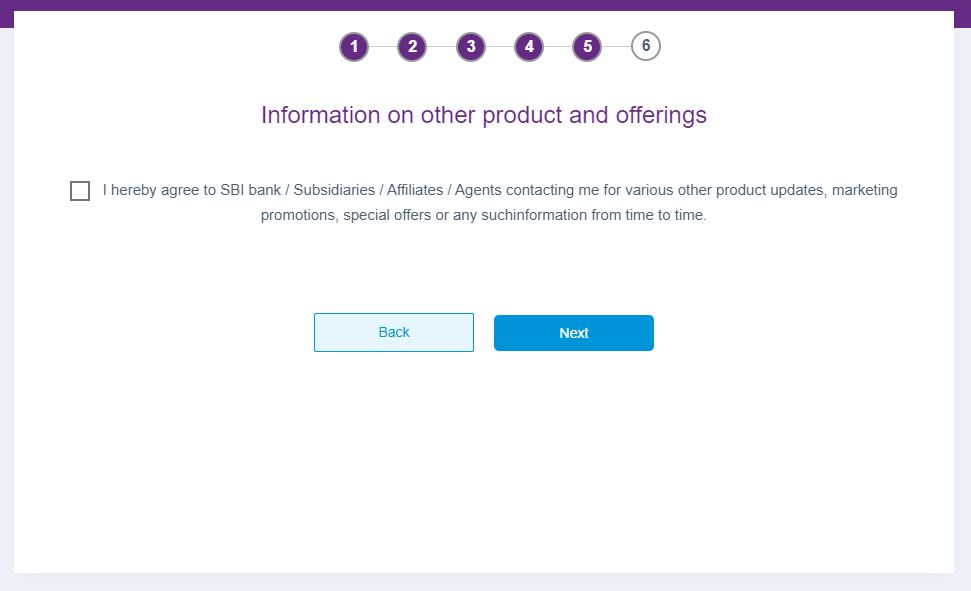
- Then it will ask for your concern for sharing SBI other product and offerings to you. Check the box and click ‘Next‘ button.
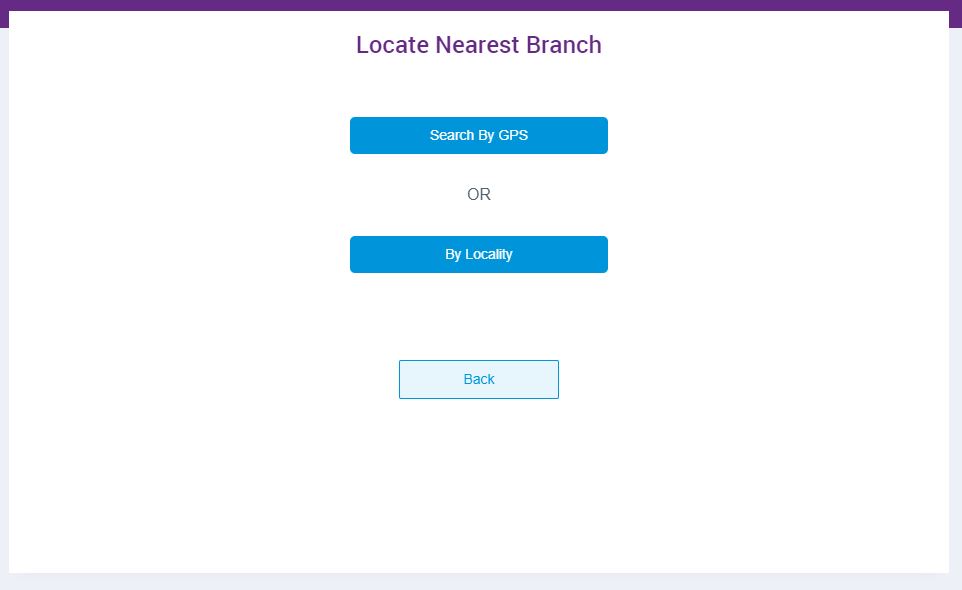
Visit Nearest SBI branch for KYC verification
- Now you will receive an OTP to your mobile number. Enter the OTP in the respective field and click confirm.
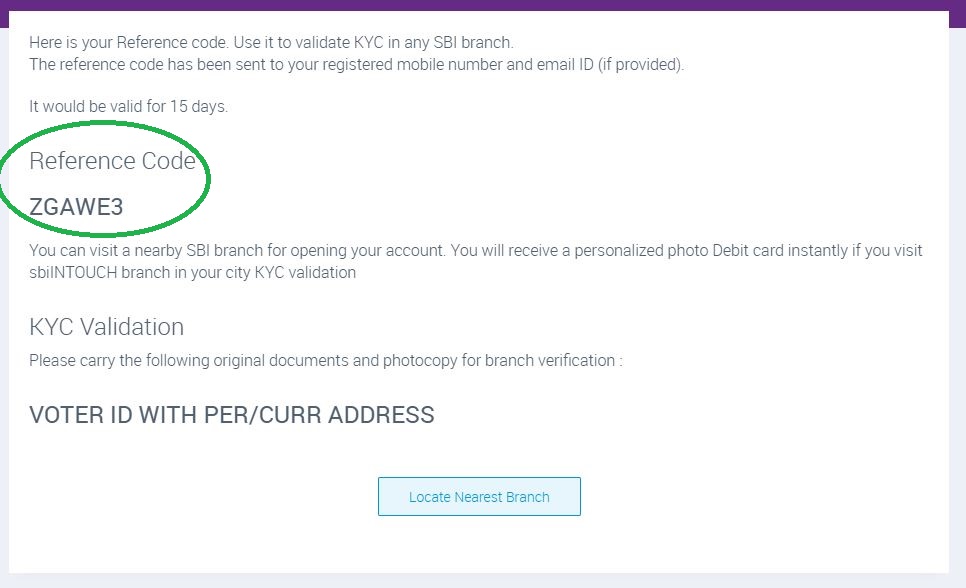
- Now you can see your Reference code in the next screen. You can also receive this Reference code to your registered Mobile number and Email ID.
- This Reference code would be valid for 15 days. Within that time you have to visit nearest SBI branch for KYC verification. You have to carry your Original documents and photocopy to SBI branch.
- After successful KYC verification your SBI Savings account would be activated and you would receive your Passbook instantly.
- You can receive Personalised Debit card and Cheque book to your communication address through register post.

This SBI Savings account is a ZERO balance account. That is, you don’t have to maintain Monthly Average Balance (MAB) for this account.
[…] our earlier post, we explained about How to open SBI savings account online?. In this post we will let you know about How to activate Yono SBI mobile application for your SBI […]
[…] our previous article, we clearly explained about how to open SBI Savings online? and How to active SBI Yono mobile application?. In this post, we will let you know about how to […]